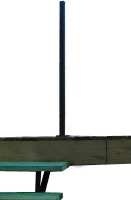
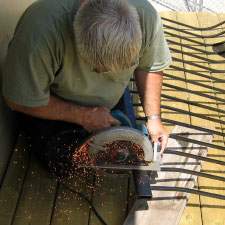
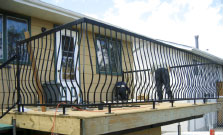
 Picture 1 |
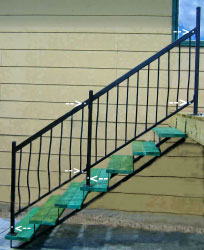
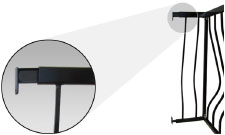
1. If you have stairs coming off your deck, we suggest that you put the stair rails on first. Install a post at the top of the stairs. REMEMBER the rail must be placed 3" from the edge of the deck to the CENTER of the rail. Also 3" in from the edge of the stairs. (Picture 1) 2. The descending railings have an adjustable front leg, that allows you to adjust the position of the railing for a perfect fit. Just slide the foot on, but don't lock it in place until you have it installed to the post (Picture 2). |
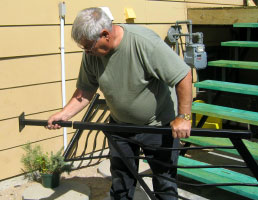 Picture 2 |
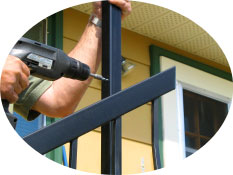 Picture 3 |
3. Sometimes you will need to set the railing in place, mark the holes, move the railing and install the screws. (Picture 3) Now you can take out the screws and install the railing using a wrench. (Picture 4) |
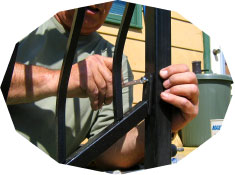 Picture 4 |
|
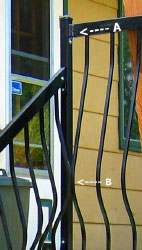
4. After you have lined up your railing and bolted down all the posts, you must now lock your railing together with the screws. (Picture 5) 5. Once the stair railings are installed, start on the deck. If you are making a 90 degree turn at the top of the stairs, you will need almost 4" between the post, at the top of the stairs and the first curved bar in the deck railing. (See "A" in Picture 6) |
 Picture 5 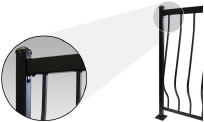 Picture 7 - Railing Post |
|
 Picture 6 |
If you don't have the proper space the two curved bars will hit each other. (See "B" in Picture 6). You may cut the railing so you have 4" at the post or you may use the "RAIL EXTENDERS" to give you the required spacing. 6. Install the railing to the posts using the brass 90 degree "Angle Brackets". ( Picture 7) You will want to install them to the railing first and then line the railing up with the post and mark the holes. Drill the screws and install the railing to the post with a wrench. (See Picture 3 & 4) |
|
 Picture 8 |
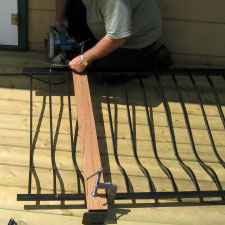
7. When you start to cut your railing, take time to plan the cuts. You may want to take a little off each end of a section, so you can control the bar spacing. If you have a long span of several sections, you may want to cut some off the first and last section, to balance bar spacing at each post. Remember no space over 4 inches. You will want to have nice clean & square cuts, so be sure to use a straight edge to guide your saw (Picture 8). |
 Picture 9 |
|
Put a "Fiber Cutoff Wheel" in your saw, to cut the railing. Keep in mind that there are lots of sparks which can start a fire or burn marks into your deck (Picture 9). CUT IN A SAFE PLACE LIKE THE MIDDLE OF YOUR DRIVEWAY
|
 Picture 10 - Railing Joiners |
8. When you have your railing section ready, slip them together using the "JOINERS". Install the joiner to take the locking screws from the side you will use, bottom, outside or inside. If you can help it do not put the screws in from the top. Bottom or outside is recommended. Be sure half of the "JOINER" is in each section of railing (Picture 10). |
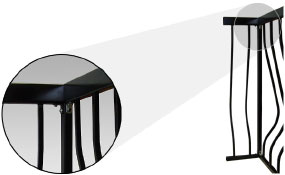
| 9. Install the "DELUXE CORNER" just like any section of railing remember this corner adds approximately 3˝" to the railing, that's from the end of the railing to the center of the railing at 90 degrees (Picture 11). | 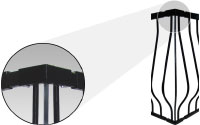 Picture 11 - Deluxe Corner |
 Picture 12 |
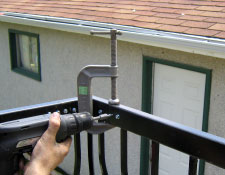
10. If you have trouble getting a perfect fit from one section to the next, use a clamp and put two screws in each section of railing (Picture 12). 11. Install a "QUICK CORNER" just like you would a post (Picture 13). |
 Picture 13 - Quick Corner |
 Picture 15 - Paint Railing |
12.You may use "WALL TABS" and bolt your railing to the house. We recommend that you use a post, if you are concerned about drilling into your wall. If you use wall tabs, lock them to the railing with the screws (Picture 14). 13. Your railing has only been primed, you must now paint it. Use a good exterior enamel and if you clean it and give it a good paint job now, it will be good for years (Picture 15). |
 Picture 14 - Wall Tabs |